Posts

Showing posts from August, 2020

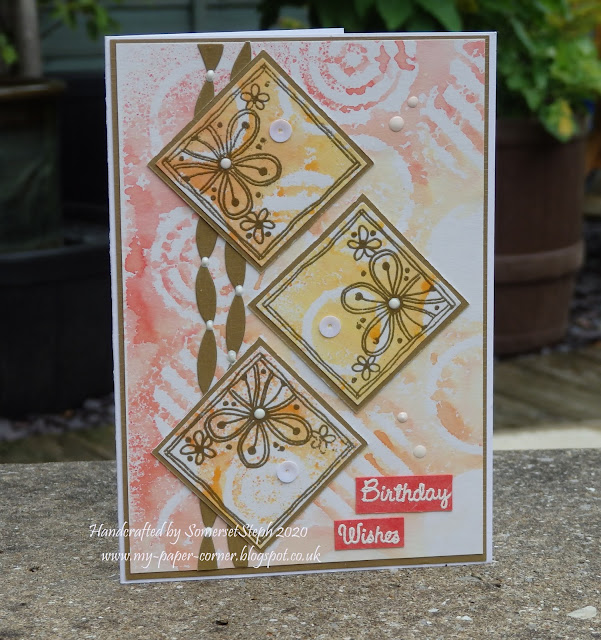
Julie Hickey Floral Frames
Image
A few months back I was experimenting spraying brushos over/through a stencil then took a print off the stencil with what ink was left behind.  This card uses the stencil print which is a more delicate and softer result.  Used a Papermania geometric circles stencil with scarlet & yellow brushos mixed in mister bottles. One of the floral frames from Julie Hickey's set was stamped and embossed with gold EP on part of the stencil print where the colour was more orange/yellow and cut into squares.  I used the more red/pink part for my base layer.  Matted everything on gold card and also cut two ribbon strips.  The layout follows Freshly Made Sketches #229 from 2016 which I happened to come across on Pinterest. Added some enamel accents, sequins and a white embossed sentiment on red card as finishing touches. I've used - A6 white card base Papermania  geometric circles stencil Scarlet & yellow Brushos Julie Hickey Floral Frames stamp Elizabeth Craft...

Woodware Birthday Grid

Image
I've been creating with Jane Gill's Woodware Birthday Grid stamp set.  Started by stamping and embossing the sentiment grid then with some scrunched up cling film I lightly dabbed some pearl effects around the edges, once dry blended three colours of distress inks to create my speckled background.  Both the embossed sentiments and pearl effects act as a resist and buff up to a lovely shine once the inks are dry. The stamp set comes with elements that can fit inside or around the sentiment grid design.  I chose the cupcake and gift both coloured with promarkers, fussy cut, shaped and adhered with silicone glue.  Added glossy accents on the cherry & decorations.  This is only the second card I've made using this stamp set, the first one you can see  here , both totally different. I've used - A6 top fold white card base Woodware Birthday Grid stamp set Olympia green Versafine ink, clear EP Dovecraft 3D pearl effects Distress Inks - peacock feathers, shaded...

Listen to the Sea - balcony front card

Image
This is my completed balcony front card, a style I've wanted to try for while but it's not a conventional balcony as I've made a seaside windbreaker style one instead as this design lends itself to be decorated in any theme you chose.  I followed an online video tutorial by Iced Images which you can find  here . My two tall back panels have had sparkle texture paste applied through a sea urchin stencil. The sparkle effect is so pretty and nothing rubs off once it's dry, I'm quite impressed as I've not used a product like this before.  I now realise windbreakers have horizontal stripes, maybe I was thinking of deckchairs instead but I do like the colourful stripes anyway!  Along the top edge of the two balcony sections I added punched border strips to give a little added height and interest. I've got so many fond memories of holidays in Cornwall, beach combing and collecting tiny seashells, the sand is so soft and fine along the coast there.   All the shells...