Posts

Showing posts from 2021

Sanntangle Christmas Bauble

Image
Sharing my hand drawn Sanntangle Christmas bauble with holly frame made into a card with simple stitched die cut matt layers. I've combined elements from two of Sandra Rushton 's recent Sanntangle tile designs - bauble from tile 195 and holly frame from tile 196 which I've hand drawn with a black micon fine liner pen and coloured with metallic pencils.  Added some shading with a pencil blended with a tortillon and white highlights with a Gelly Roll pen. I feel this has ended up with an antique look with the colours used, not my original intention but I still like it! Linking up with -  Peace on Earth Challenge #5 ATG Thank you for visiting - I'd love you to leave a comment if you have time -  Steph x
My Sanntangle Art - Autumnal Birthday Presents

Image
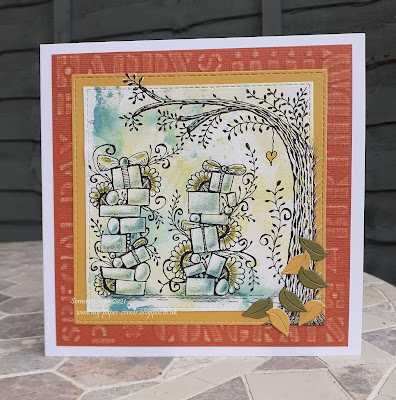
Made one of my hand drawn tangle designs up into a birthday card - lots of presents under a tree in an Autumnal setting. Back in the summer I found a piece of watercolour card in my stash with green & yellow mop up ink on it so set about drawing with a black micon pen the piles of presents then added a tree to frame one side and overhang the top.  I've added colour and shading with metallic pencils. A bold birthday words stencil was dry embossed on core'dinations card then sanded back to give a textured layer.  Decided to add some die cut leaves floating down and matt layers all in Autumnal colours. This is the piece I started with.  Hand drawing was something I rediscovered a year ago.  I started following Sandra Rushton and her twice weekly tangle tile designs where she also encourages us to create bigger pieces of art either for framing or making up into cards, her twist on the traditional Zentangle. This overall design was inspired by Sandra Rushton's Sanntangle til

Happy Christmas to Ewe

Image
Well I think my Christmas sheep have turned out rather cute one wearing his red festive hat although his black faced cousin looks a little bemused but at least they both have warm woolly coats!  I've used a Funky Fossil stamp set and one of their tree dies just adding the word 'Christmas' from my stash.  Kept both cards clean and simple with a stitched matt on a scalloped edge card base. My first sheep's hat is the small cloud stamp from the set topped with a sparkly die cut circle for a bobble and he's sat on some sparkly tree branches embossed with white & silver super sparkle EP. My second sheep I've placed beside a fence that has been painted with some pearlized accent ink with a flower to hide one of those annoying smudges that just suddenly appeared.  Coloured the top of his head red, my thinking that's a small hat he's wearing. I've added swirls with a glitter gel pen onto both of their coats and kept the same sentiment too. I've used

Stencil Monoprint - Guest Designer at CAS Mix Up

Image
I was so very pleased to be invited as a Guest Designer for CAS Mix Up  this November where the challenge prompt is stencil monoprint (you can see my card that won their September challenge here ). Creating a stencil monoprint is a fun technique to do and also proves how versatile stencils can be.  If you've not tried this before here are a couple of video tutorials: Stencil Monoprints - Lee-Anne Cross (6:50) Stencil Monoprints Backgrounds with Distress Inks (8:28)               I chose to work with a pretty Indian Mandala stencil and distress inks in shades of blues and greens dabbing them over one side of the stencil, misting with water then pressing down on some watercolour paper.  Left the print to air dry then placed the stencil back over the design and sponged over some yellow ink to soften the white areas.              And then quite radically I sliced my print up adhering the strips to some acetate and placed a leaf aperture panel over the top.  Added a die cut 'Birthda

Lady Meerkat's Summer Birthday

Image
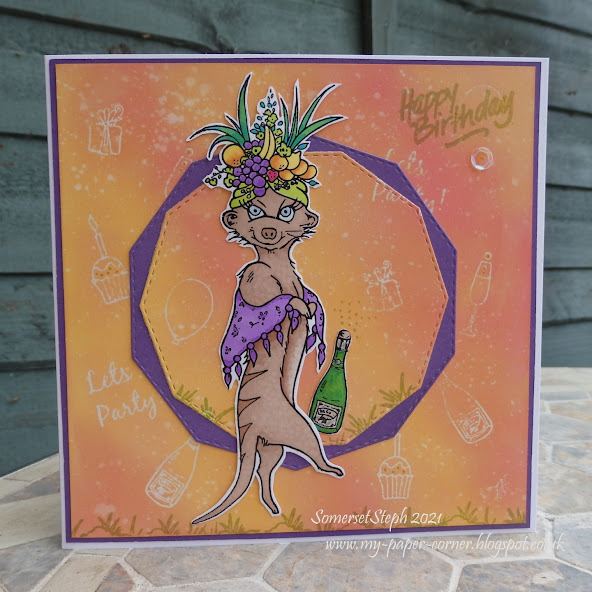
Meet Lady Meerkat she is dressed up ready to party!  This year I have made most of my close family cards using Hobby Art's Meerkat Madness stamp set and this one has a summer tropical vibe even though it's autumn outside! I used some of the smaller stamps from the set on a square of white card to stamp for an emboss-resist technique before blending over four different Distress Oxide inks.  Flicked some water over the panel as well to add more interest.  Kept the stamping light so as not to detract from the main character.  Decided to then cut the middle out with a stitched decagon die and off set that with the next size up die in a purple matt layer behind. Lady Meerkat and her bottle of bubbly have been coloured with promarkers cut out, shaped and adhered with silicone glue.  I love her fruity hat!  Some extra green grass stamping and sentiment with a sequin to finish. I've used - 6x6" white card base Hobby Art Meerkat Madness stamp set Hunkydory Ink Me! card DO's

Autumn colours

Image
September at  CAS Mix Up  is a watercolour challenge with Autumn Colours.  We have a small acer tree in our garden that is just starting to showcase it's autumn colours and as we finally planted it in the ground from it's large tub earlier in the year it has really blossomed so we are going to get a good show soon. I die cut the solid tree base from watercolour cardstock and used my watercolour pens to add autumn colours before spritzing with water.  Once dry I rubbed some gilding wax around the edges and trunk and spritzed again with a shimmer spray.  Maybe a tad too much spritzing as the tree now has a mottled look!  The skeleton tree was die cut from metallic cardstock and added on top. Hopefully showing some of the shine & sparkly card base I've added an abstract die cut behind the tree for a trellis effect with some scattered 'cake sprinkles' from brusho die cuts to represent falling leaves (they are just too nice to throw away) and I don't mind stickin

What's the buzz?

Image
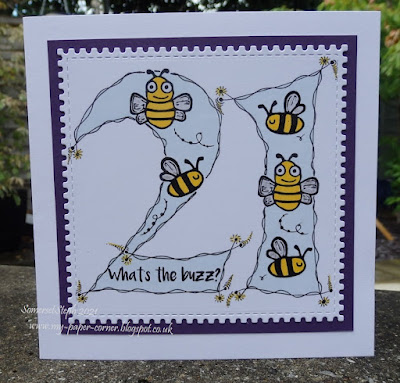
Sharing a fun 21st birthday card with my own hand drawn doodled numbers, simple stamping and colouring. I firstly die cut a stitched postage stamp matt from white card and lightly drew the numbers in pencil so I could stamp the sentiment and bees in the right places before going over with a black fine liner pen.  Added some tangle doodles to the cross over ends and bee trails too.  All the stamping has been clear heat embossed as I love the shine effect. Promarkers were used to colour A purple matt layer shows off the lovely postage stamp edge detail and I did add some glitter gel pen on the bees' wings, shame the photos haven't picked that up.  Once I had decided on the design it was a quick(ish) make to achieve, well for me anyway! I've used - 6x6" white card base Hunkdory stamping card Funky Fossil Bees Knees stamp set Promarkers - sunflower, ice grey 1, tea green Unbranded stitched postage stamp die Linking up with - International Art & Soul  Ch#116 Birthday   

Anniversary Wishes

Image
I had already decided to use a coral colour on this anniversary card as that was the colour of the bridesmaids' dresses but was undecided on a second colour until I spotted the current  Color Hues  challenge was to use turquoise and coral. Using one of the quirky tree dies from Funky Fossil I cut three solid bases from card water coloured with scarlet brusho.  The top leafy layer was heat embossed with silver pearl EP and I've used the trio as a botanical element inside a die cut decorative pot backed with turquoise card.  Sentiment stamped in turquoise. Finishing touches some die cut hearts from the same brusho coloured card I've used - 6x6" white card base Funky Fossil quirky trees die set Scarlet brusho powder;  Silver pearl EP Unbranded stitched square die Unbranded mini botanical pot die Sentiment & heart die from stash Linking up with - Color Hues  #24-Turquoise and Coral Thank you for visiting - I'd love you to leave a comment if you have time -  Steph x

Forest Friends Birthday

Image
Sharing this year's birthday card for my Dad made with a lovely stamp set from Funky Fossil called Forest Friends.  My mojo is slowly coming back and I was inspired to make this when I saw one of the DT member's Sam Squire's card ... this is my take on her design which you can see here on her blog. I kept the silhouette focal images dark but tonal and paired them with a vibrant background which was created with yellow and brilliant red brusho powders spritzed with water.  Once dry stamped the squirrel, toadstools and leaves with a mixture of black, green and grey inks before die cutting into a square topper with a stitched edge die.  Decided on a grey matt layer and added a die cut 'branch' using the same cardstock. The sentiment and two side 'trees' were stamped directly onto the card blank in green ink.  Added some black filmstrip washi tape running behind the topper which helps to ground everything together.   I love that the squirrel and toadstools have

#HB2u

Image
Hello fellow crafters yes it's been a while but life, lost mojo and then the hot weather has meant no proper crafting for what seems like ages. I have a new follow by email button on the sidebar as by now most of you will know that the Feedburner email subscription service is ending soon so please register if you'd like to carry on seeing what I create 😊 I really couldn't put off any longer to make this masculine birthday card so chose a simple CAS inked panel design. Started by masking off the centre section on my card blank and brushed over squeezed lemonade DO ink.  Once dry I stamped random lower case letters in hickory smoke DO then changed to a versa mark ink pad and stamped some more brushing those with silver iridescent mica powder for a lighter shiny tone. Showing the shine! On top of the inked panel are die cut stitched circles with the on-line user acronym of Happy Birthday to you #HB2u stamped in black with clear EP and edged in black to make them stand out mor

CAS Christmas Card Challenge - Guest Designer

Image
Very pleased and excited to be sharing as guest designer for  CAS Christmas Card  ... it's their June 'Snowman' challenge ... thank you so much!  I was delighted to win their April challenge with this card .                                 My jolly snowman is a Penny Black stamp from an old set stamped and embossed onto some white pearlised cardstock as my card blank.  He's coloured with promarkers and some smudged white gelly roll pen for highlights.  He was then masked off before I sponged blue distress inks through a Funky Fossil rooftops stencil to create a towering urban backdrop softening the inking towards the bottom. Added more white highlights on the rooftops too Finished with a stamped and embossed sentiment.  It's not very often I create a one layer card, just didn't want to cover up the lovely pearl effect! Do hope you'll hop over to  CAS Christmas Card  to see all the other lovely snow people cards that the design team have created and why not j